File Transfer Protocol (FTP) is a powerful tool that allows you to swiftly manage files on your hosting plan. Back up your sites, upload new files, and manage your web hosting files on the fly!
Most FTP client apps will work with this guide; we recommend the following clients for the following platforms:
Windows | Mac OS | Linux | iOS | Android |
Note: FileZilla is free & open source software under the GPLv2 or later.
Important Information for Connecting
| Field | Information |
| Hostname | The IP address specified in the top left in the web panel (step 2) |
| Username | Your created FTP username (below) |
| Password | Your created FTP password (below) |
| Port | 21 |
Step 1: Create an FTP User Account
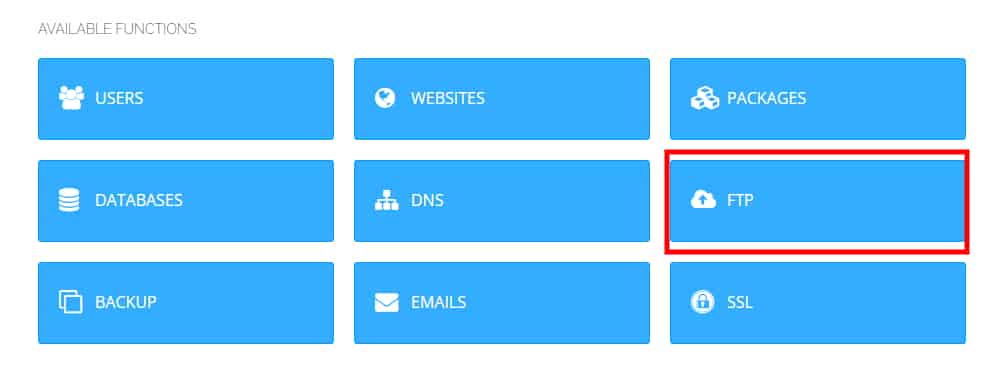
Login to the web panel and navigate to the dashboard. Click FTP.

You have a few options at the next screen.
- Create FTP Account– will allow you to select a website and create FTP accounts under it.
- Delete FTP Account– will allow you to delete a created FTP account.
- List FTP Accounts– will allow you to manage each created account including resetting credentials.

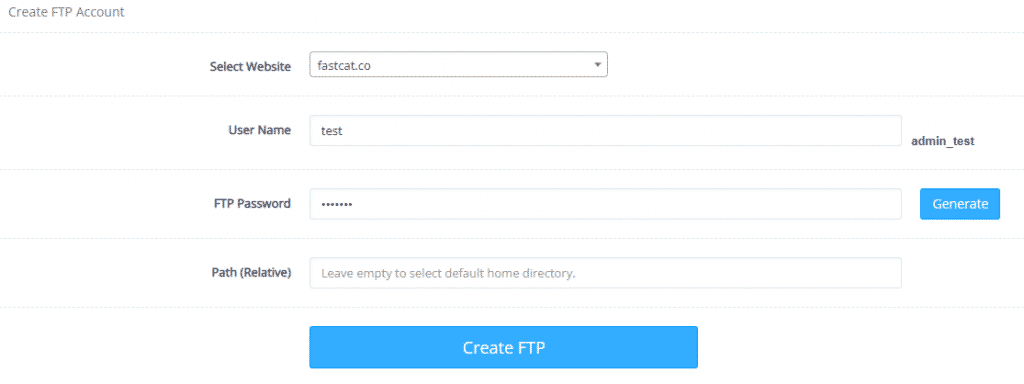
For our purposes, we need to Create FTP Account. This will show the FTP account creation page. First, select a domain for the account, and fill in a Username, Password, and Path access (optional).

Success! Now under List FTP Accounts, you will see your newly created account as well as administration options for it.
Step 2: Login Using a Chosen Client
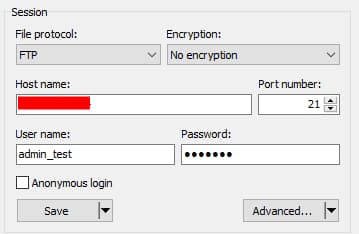
Once an account has been created, you can log in using an FTP client. For this example, we’re using WinSCP on Windows 10.
Begin by opening a new connection and populating the fields accordingly.

Important: The hostname for the connection is the IP address shown on the top left of the web panel in red
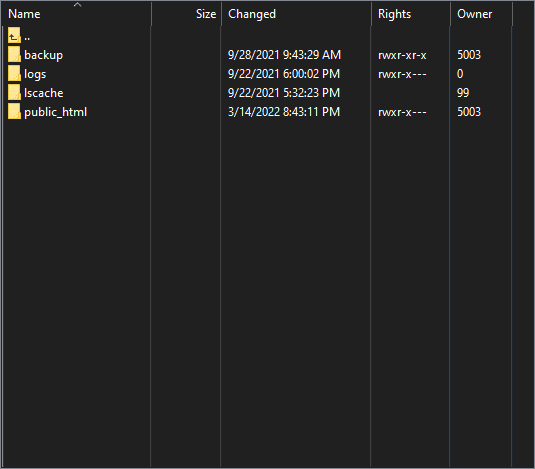
… and voila! You’re in, through the protocol power of FTP!

Not a FastCat Web Hosting User Yet?
What are you waiting for?! Experience top-tier, affordable web hosting with a blazing 10 Gbps port standard across all our plans. Shop our web hosting today!


